Using plugins and applying new themes will not take you up to the desired results every time. Sometimes in WordPress, when you make any changes, it leads you to the white screen of death, and then you have no choice.
To tackle any issue, you should make all changes to a testing environment and then make it live. We will try to guide you on creating a WordPress test site to perform experiments first and then make it live.
Creating a staging site or testing site is the same in the WordPress environment. The testing site uses to make custom changes in functionality or changes regarding plugins and themes. The testing site helps test and pick the deficiencies and errors, so you take precautions and resolve the issue before making it live.
There are different approaches to making a testing site in WordPress. Some people prefer to make a website on a local server by installing WordPress locally. They make changes to their Website locally, and if it goes well, they upload it to the live server.
However, we always recommend working in a real-time environment because situations and problems could be distinct concerning the environment. It is better to test everything on a live server than offline because you eventually have to upload it to the server.
Testing Site Vs. Staging Site
Testing or Staging a site in WordPress is the same. It’s just about what you feel is the more convenient word for you. The goal of testing or staging the site is exact; if WordPress user needs to update or try to fix or find any bug and want to apply new themes or plugins, they always prefer to perform these tasks on a testing rather than live site. To make our live site secure and prevent it from any damage.
Why Need To Make A Testing Site
Before getting to know How To Create a Test Site In WordPress, you should understand why you are doing it so; when you build a test site, there are specific changes that you face some drawbacks of it, but mostly, advantages take the cake over disadvantages.
Advantages:
- It will help you make changes to the Website’s functionality without causing any harm to the live Website.
- You will be able to find bugs and errors in the site without disturbing the original Website.
- Explore more; With a testing website, you can make more creative decisions about your Website and do experiments with it.
- If you ever get into any problem on your live site, the testing site can work as a backup for you, and you can get back to the old state of your Website.
Disadvantages of Testing Site:
- Creating a staging site could be a cost-increasing decision on your project.
- It is sometimes gots complicated and consumes time more than you expected.
- You must have to be sure what changes and options you have selected while testing on the Website because when you apply it to the live Website and forget, even a step can create havoc on the Website.
We can tackle these problems if we go with the right approach while staging the Website.
How to create a test site in WordPress
-
Web Hosting
Web hosting providers like WP Engine Kinsta, Cloudways, and BlueHost provide the facility of creating a WordPress testing website via their Cpanel. With these hosting providers, you can use this build-in facility. Creating a testing website via web hosting is the easiest and most widely used method because you can easily do it with some clicks rather than getting into technicalities.
If your hosting company is providing this service, you can click on the staging option and put the testing website name with a corresponding domain name of that Website, and that’s it for you.
After setting testing website, you can play with it and make any changes and updates you want to do with it. You can try new themes and plugins and even make changes to the core files of the Website. If you satisfy with the changes you have made, you can quickly push them to the live Website.
Pros:
- You don’t need to install extra plugins.
- No need to do extended configurations.
- Quickly and easy access.
Cons:
- Works on the server.
- It Could lower the speed of the original Website.
Create A WordPress Test Site Manually on Subdomain
To create a test site manually, you should have familiar with some technical details, beginners who cannot understand technical terminologies should beware of using this method.
Caution: As you create a testing website in the same manner, you also have to delete it manually.
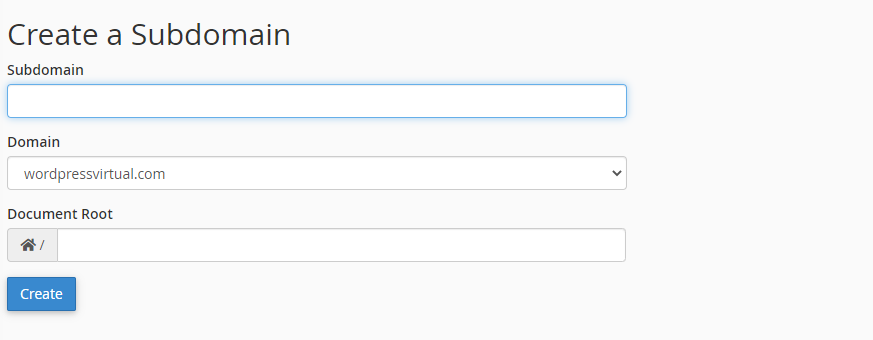
Step 1: Create A Subdomain
For creating a testing site manually, you must have access to Cpanel. After login to Cpanel provided by your hosting service. Click on the Subdomains option and create a subdomain, name it as testing or staging or anything you want.

Step 2: Compress and Download Website Files
To manually copy a website, you need to have access to the Website’s server-side, and to access server-side files, you need to have FTP credentials, or you can access the root folder from Cpanel> file manager. Then log in to FTP; you will see all your Website resides in folder name public_html or website name. We are using Cpanel to access public_html

Now you need to select all files and right-click; you will see an option called compress; click on it.
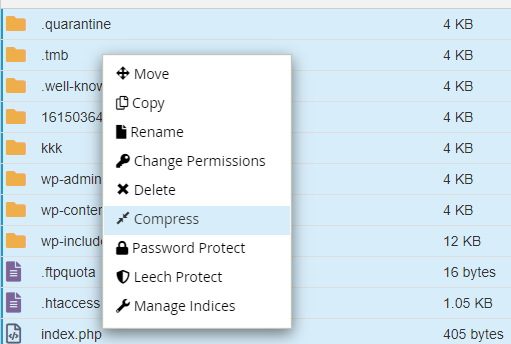
It will create a zip file. You can download that zip file.
Step 3: Download Database
Downloading a database is one of the critical steps in manually cloning a website. The database is the backbone of any website, so after copying all the files from the server, it’s time to export the database.
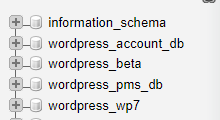
Go into the PHPMyAdmin,

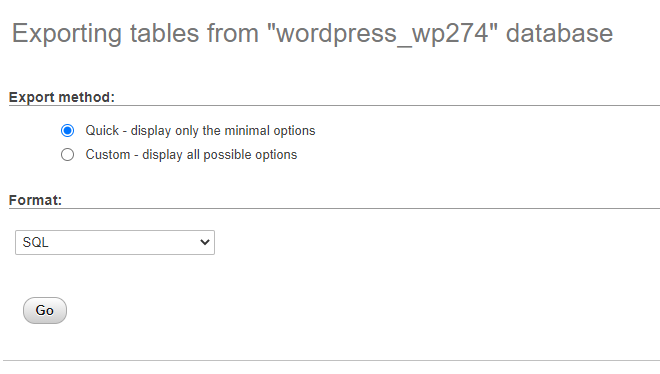
Select the database you want to download click on the export button.

Now click on the Go button, and download that exported. SQL file.
It would be best to put this downloaded database in the folder where you have downloaded other Website files.
Step 4: Upload Website to Testing Site
It’s time to upload all these files to the testing site we have created as a subdomain. We have to put all the downloaded files in the testing folder on the server.
To do this, we can use FTP or can use Cpanel File Manager option, Go to the public_html folder, find and select the testing folder.
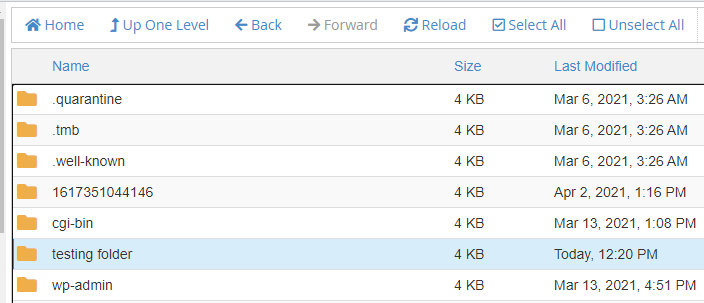
Inside this folder, click on the upload option.
Inside this folder, click on the upload option.
Browse and upload all the files you have downloaded to your local computer and extract it.
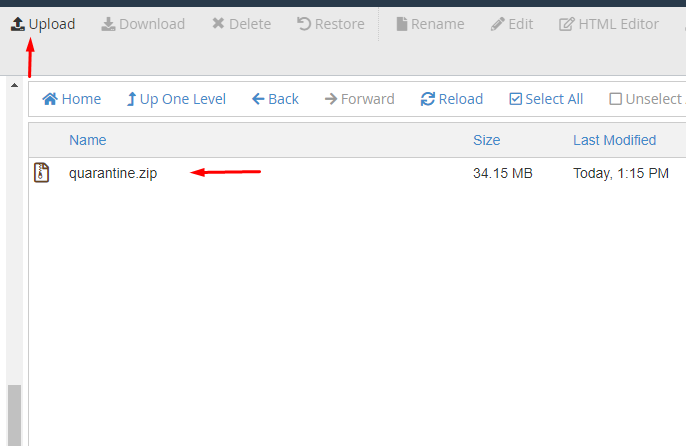
Step 5: Upload Database
After uploading the Website to the subdomain, it’s time to import the database to the testing website.
This time Go to the MySQL Databases via Cpanel and go to the database manager.

Now click to Create a new database, and after creating a unique database,

Go down to this page and click on Create MYSQL user option for your database; make sure you note that new SQL user information.

Assign the new user to the database.
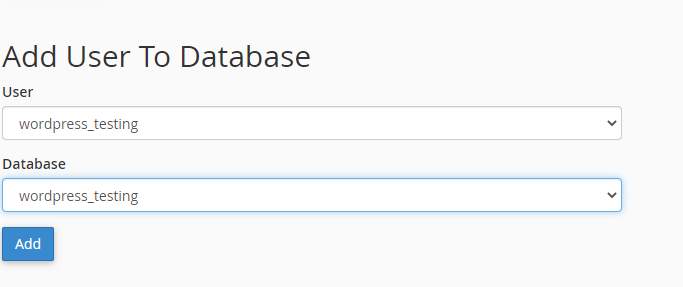
Again in the Cpanel, PHPMyAdmin, Go to databases. Select the database we have just created

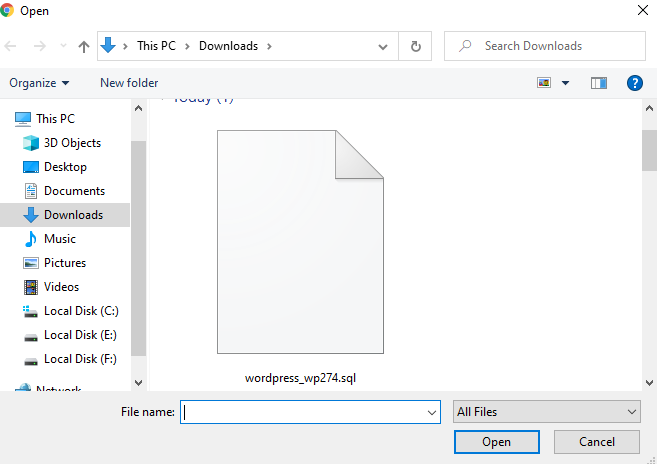
Click on the Import option and import the database we download and stored on our local computer.
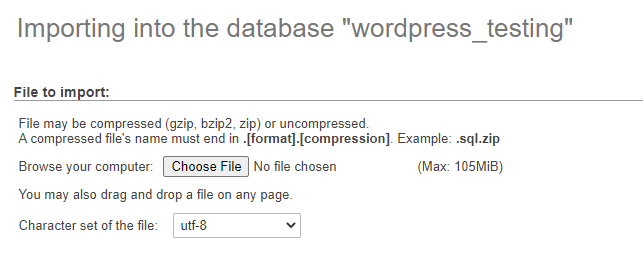
Step 6:Update wp-config.php
Now we have settled files and database, the last thing we have to do is update our new WordPress installation’s wp-config.php file. You need to update the new database credentials into the wp-config file.
Login to FTP or Cpanel Go to File Manager You will see the public_html folder or folder of website’s name in this folder find your testing website’s folder and in this folder right click and edit the wp-config file.
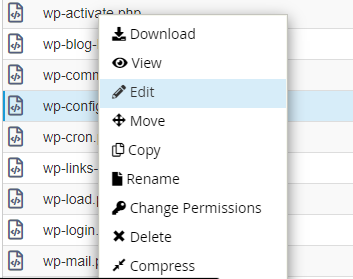
You will see original websites database credentials here, edit them and replace them with the new credentials we have created in the last step by adding a new MySQL user.

Now you can access your testing website by using URL testing.Nameofyourwebsite.com.
The login credentials will remain the same as the original Website.
Pros:
You have full access to files.
You Can keep and skip files you want to.
Cons:
It will Need technical knowledge.
This method will consume more time.
How To Create a Test Site In WordPress via Testing Tools
Various tools are available in the software market to create a testing website. One of the trending methods that beginners are using is using tools like Local.
These tools create a copy of your Website locally and allow you to redesign the whole Website and apply recent changes as you want. The live Website doesn’t get affected by it.
You have to follow some steps to get started with Local.
- First, you need to download a copy of your Website (See Create A WordPress Test Site Manually on Subdomain), which you can get by making a backup of your Website.
- Download the Local software to your laptop.
- Launch the Local software and import the zip file you just have downloaded, or you can drag and drop it as well.
- If you want to configure any setting, you can also do that in Local software.
- Now you can log in to your testing website and start making changes.
When you did various testing functionalities and make changes, you can push these changes with ease to your hosting server by exporting the Website to your hosting provider. i
Pros:
- Easy to understand.
- A non-technical user can also use this method.
Cons:
- Software base testing could reduce the speed of your system.
- You have to have a good command of software.
Jurassic Ninja
The Internet provides you with comprehensive options to create a WordPress test site. We have shown you some of it. There are More tools, offer you an easy way to create a WordPress test site.
Jurassic Ninja is a cloud-based solution to quickly create a WordPress test site environment for a beginner and user with no technical knowledge.
Beginners nowadays prefer using Jurassic Ninja to test plugins or themes before making it to their live websites.
To use Jurassic. Ninja Go to your browser type Jurassic. ninja
Now you are at the homepage of Jurassic. ninja
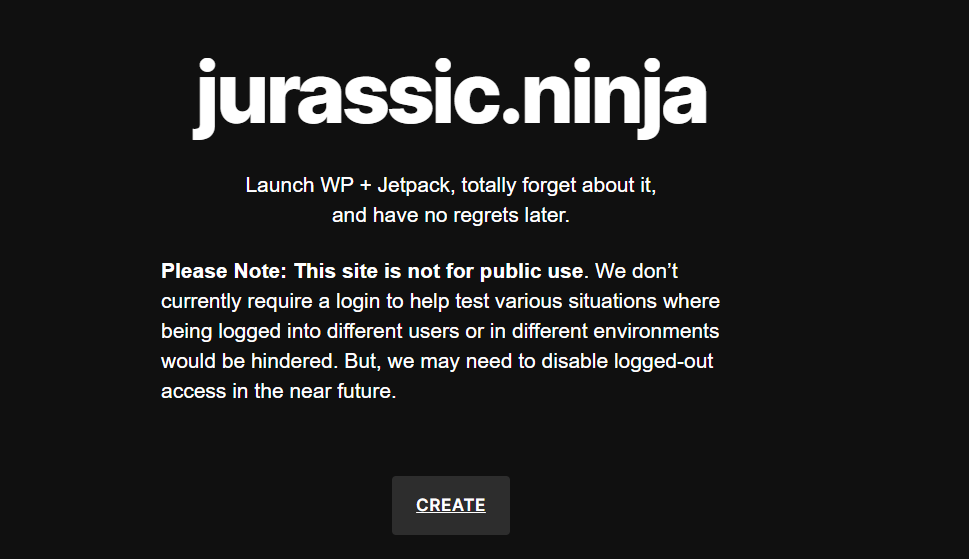
You will see at create button click that button.
It will show you a screen with the message “loading WordPress” wait a Lil bit.

Have patience; it will take some time.
After loading, you will see a link carrying the massage “The new WP is ready.”Click on this link, and you will see a standard WordPress dashboard; now, you can work on it as you want.

If you again want to login into the environment after making changes to the current WordPress you have created and want to change it also, you can do it. Jurassic Ninja provide you credentials through which you can again log in to the same WordPress you made changes to,
To find your login credentials.
Look at your dashboard you will see a welcome message. Right under the first line, you can see your credentials Named WP user and Password.
Pros:
- It is cloud-based so that you can access it at any time.
- Easy to create an account on it.
- No technical knowledge is required.
- Do not take loads of space on your machine because it is cloud-based.
- The ninja can be helpful to do rapid testing if you have to test more sites.
- Free to use.
- Less resource usage.
- Jurassic. Ninja is not dependent on your local system; it just needs a browser not to consume your disk space and use fewer PC processing resources.
Con:
- Jurassic Ninja provides you seven days of cloud usage of it. You can access it from anywhere whenever you want; it can be extended up to 14 days if you use your login credentials.
How To Create a Test Site In WordPress with Wp Staging Plugin
We have seen various methods to create a testing website where we can do customization for our Website. Our main goal is to provide the easiest way to create a staging site so even a non-technical and new WordPress user can set a stage to do experiments without harming his live Website.
Wp staging is one of the famous migration and cloning plugins for WordPress. You have both versions of it Free as well as paid with some extra features.
To use WP Staging Plugin, log in to your WordPress,
Go to your plugin menu.
Click on Add new
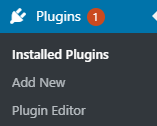
Search for WP Staging

Click on Install

After installing, you will see an option of Activate. Click on Activate
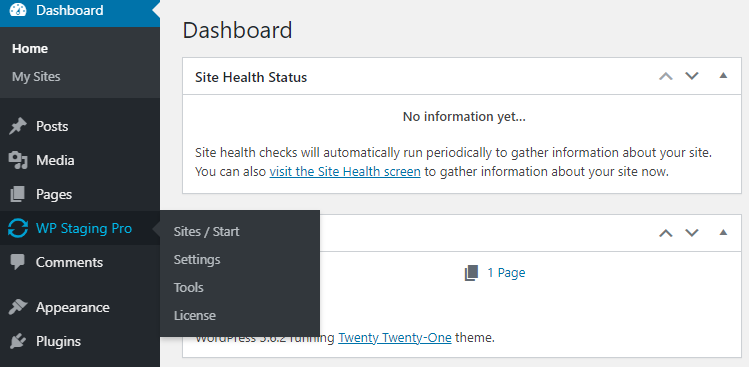
Now you will see the left menu has a new option called Wp Staging.
Click on Wp staging
Now name the testing site you are going to create,
You can choose from multiple options like the folder and what database you want to copy.
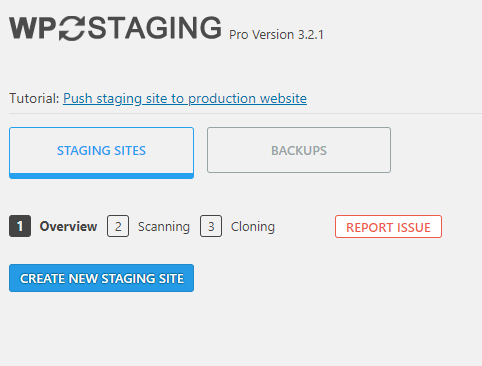
Now click on Start cloning and wait.

The process will take some time, and when the process ends.
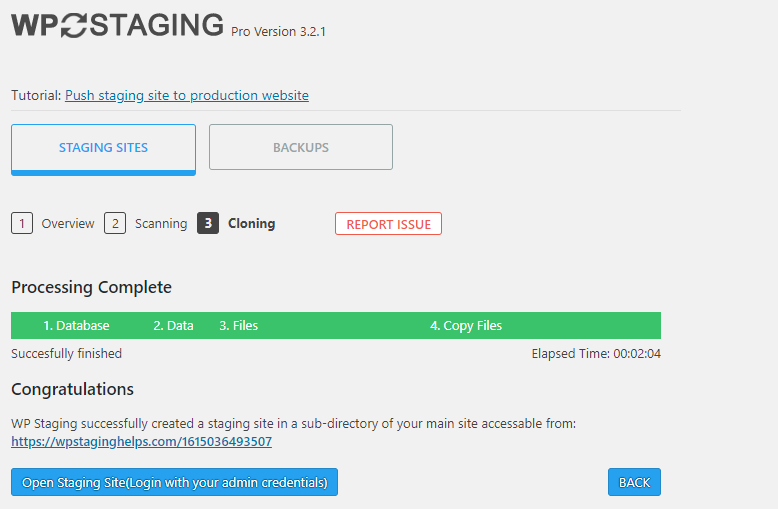
Now log in to the staging site with your original Website’s credentials.
You are now free to experiment with anything with your testing website.
Pros:
- It is easy to use.
- No technical knowledge is required.
- Simple On click steps.
- Easily accessible from the WordPress plugin section.
Cons:
- If you need any extra features, you have to buy the premium version of it.
Create a Test Site on Offline WordPress
The last and least option is to create and work on an Offline WordPress application. Yes, although WordPress is a SaaS environment that provides everyone an excellent opportunity to develop their websites with less technical knowledge. It is available Offline as well if someone wants to improve his hands-on WordPress.
You can download the offline installer of WordPress from https://bitnami.com › Applications › Blog.

After download, install the package into your system.
Set login credentials while installing

After install open any browser and type localhost.

After install open any browser and type localhost.

WordPress will appear, and it will require the credentials that you have set during installation.
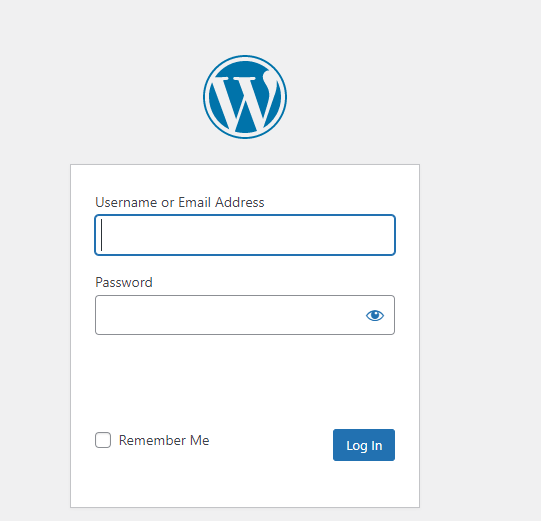
You have logged in to WordPress; you can see the standard WordPress dashboard as you are working online.
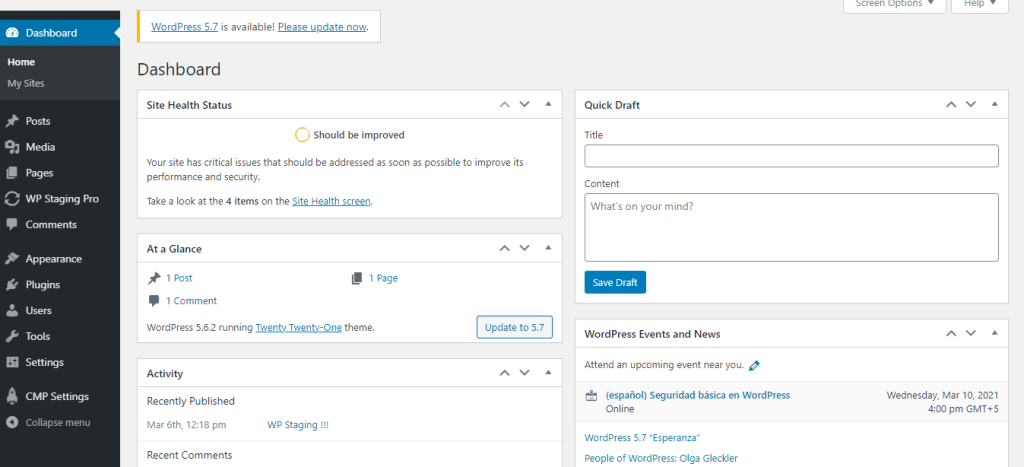
You have to perform some same steps as we show you in the first method.
- Go Plugins click on Add new.
- Add File Manager plugin.
- Installing the plugin will add a file manager option on your left menu pane.
- Go to File manager Public_html.
- Paste your Website here.
- Now Go to Phpmyadmin
- Add new database
- On this database, click on import and add the original Website’s database we exported from its database.
- Go to your wp-config file via the File Manager plugin, edit wp-config, and add your SQL user credentials to that file.
Now you can perform various experiments, install plugins and themes to test your theme.
WordPress Offline is a good option for new beginners who want to understand WordPress to work online on WordPress.
But for the experienced person, Testing a Website in an Offline or local environment is not an option. Because it doesn’t work in a real-time environment, and you can’t evaluate the bugs and errors that could happen when we put our Website on the hosting server.
Pros:
- Easy to use for beginners.
- No need for the Internet.
- You can work even offline.
- Always on your system don’t need the Internet.
Cons:
- Strictly for beginners.
- Offline WordPress could neglect real-time issues of the live server.
- It could cause more problems when we push the Website live.
Conclusion:
Changes and upgrades of the websites are inevitable, but sometimes not all changes are compatible with our Website. To be cautious, a wise admin will perform all-new activities and alterations to the cloned testing site before applying it to the live Website.
Although cloning a website could be hectic for the owner, there are easy ways to create a clone of your Website, and you can make changes on the testing site, so updates don’t affect your live Website.
I have stated each possible method to your query “How To Create a Test Site In WordPress”. If still, you face any problem you comment down.


